I am basically going to focus on the program assuming you know how to burn the program onto your micro controller. If you dont i would be more then happy to help. So lets get started!!!
First open AVR studio and Click on New Project.

Select AVR GCC as the project type.

A blank space should appear. This is where you type your program.

So now that you have familiarized yourself with avr studio, let us take a look at a basic avr circuit.
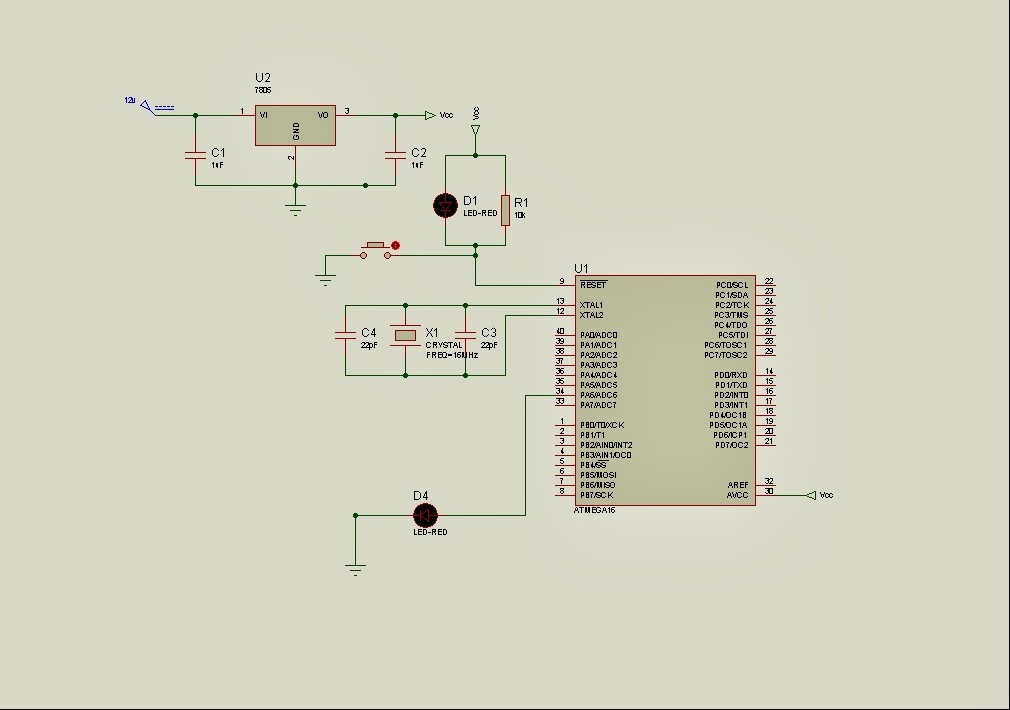
So basically i drew the blow circuit using Proteus. You can just download it. It is a great tool to replicate the the working of a micro controller without getting your hands dirty. Just experiment with the software and you should be able to get it working. i have drawn the most basic circuit in Proteus which employs an atmega16, a lm7805 voltage regulator and some led's.

If you have problems in using Proteus you could refer some online tutorial, as there are plenty of it, alternatively you can use an avr simulator ide by oshon software. Its really simple, but doesn't let you draw your own circuits like Proteus does.
Now that you have familiarized your self with avr studio and Proteus, you can move onto the next tutorial.
First open AVR studio and Click on New Project.

Select AVR GCC as the project type.
Type the project name, Click Next.


The navigate through the DEBUG PLATFORM( AVR Simulator, AVR Dragon etc) and select the micro controller that your working with.(atmega16, atmega32 etc).

A blank space should appear. This is where you type your program.

So now that you have familiarized yourself with avr studio, let us take a look at a basic avr circuit.
So basically i drew the blow circuit using Proteus. You can just download it. It is a great tool to replicate the the working of a micro controller without getting your hands dirty. Just experiment with the software and you should be able to get it working. i have drawn the most basic circuit in Proteus which employs an atmega16, a lm7805 voltage regulator and some led's.
If you have problems in using Proteus you could refer some online tutorial, as there are plenty of it, alternatively you can use an avr simulator ide by oshon software. Its really simple, but doesn't let you draw your own circuits like Proteus does.
No comments:
Post a Comment